In this tutorial you will learn how to easily create, configure and send an email marketing campaign with video that plays directly in the inbox, using Campaign Monitor and Viewed.
How to create email marketing with video using Campaign Monitor and Viewed
Yes, it's real!
Viewed is a platform that solves the problem of embedding video with autoplay in email marketing campaigns, easy to use, mobile-friendly and 100% compatible with Campaign Monitor. You can create professional, high impact and dynamic email campaigns that increase CTR up to 173%.
1. Create your Viewed Account
If you don't have an account, create one . By default, you will be logged in the FREE plan, that includes 100 video impressions to make some tests. You can upgrade your plan or purchase extra video impressions as needed. Viewed delivers millions of videos in email every day. It has solid servers and is partner of Amazon and Google Cloud to deliver your videos in the emails, regardless of the volume or concurrent users.
2. Upload your Video File
The Viewed platform is compatible with all video formats such as mp4, avi, mov and flv. Press the blue button “Upload Video” on the right side of your screen:
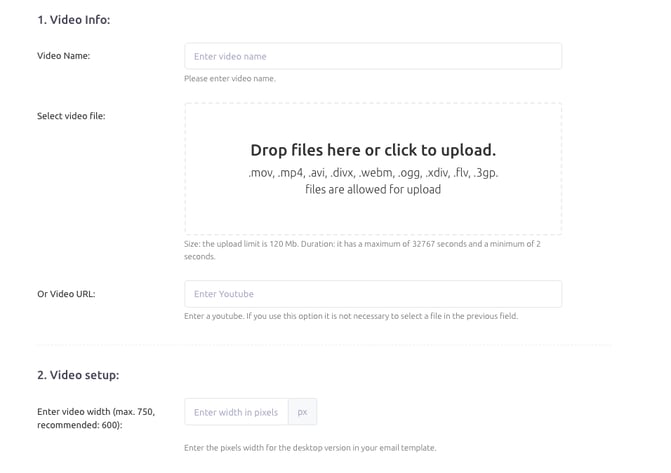
Then fill the form:
- Video name: It’s a name to identify the video in your list.
- Video file: you have to options:
- Select a video from your computer. You can use the drag & drop system or click to search and upload.
- Or introduce a youtube or Vimeo video. It is no needed to select file in the previous field. - Video width: it’s the video size in pixels in your html template.
- Click on the green button “Upload Video”
3. Coffee Time!
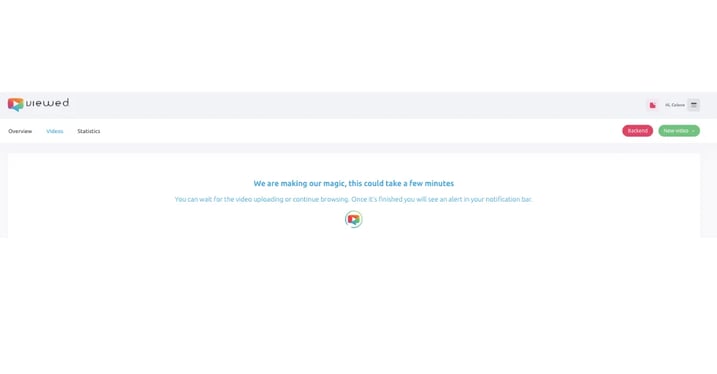
It´s time to have a cup of coffee. It will take just a few minutes. Relax, our System is in charge.
Viewed will automatically create all the necessary video formats to be compatible with every Operating System, device or navigator.
4. Get the code for your email
You have three different ways to get the code for your email:
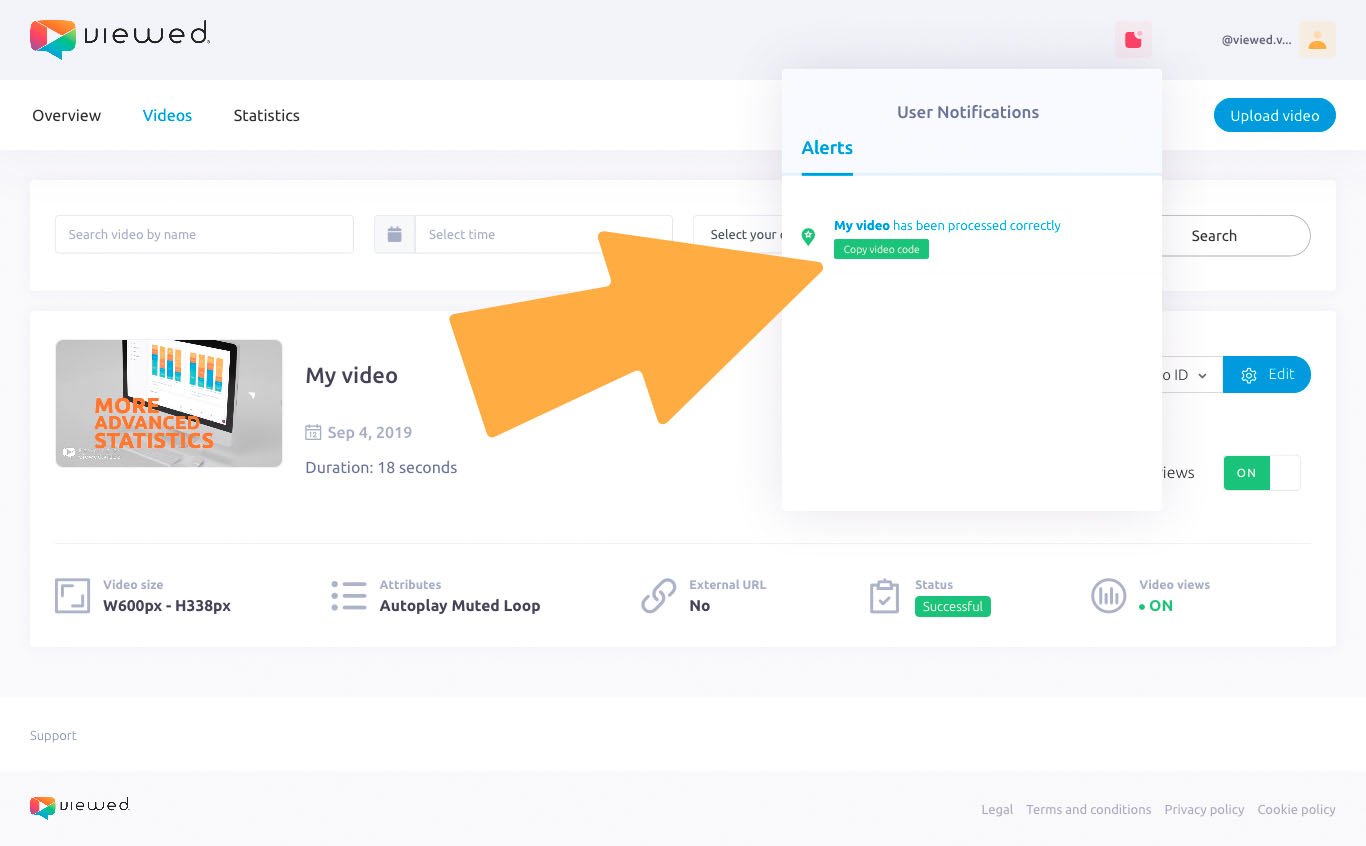
- Notification bar: when the upload finishes we provide you a link to the code in the notification bar.
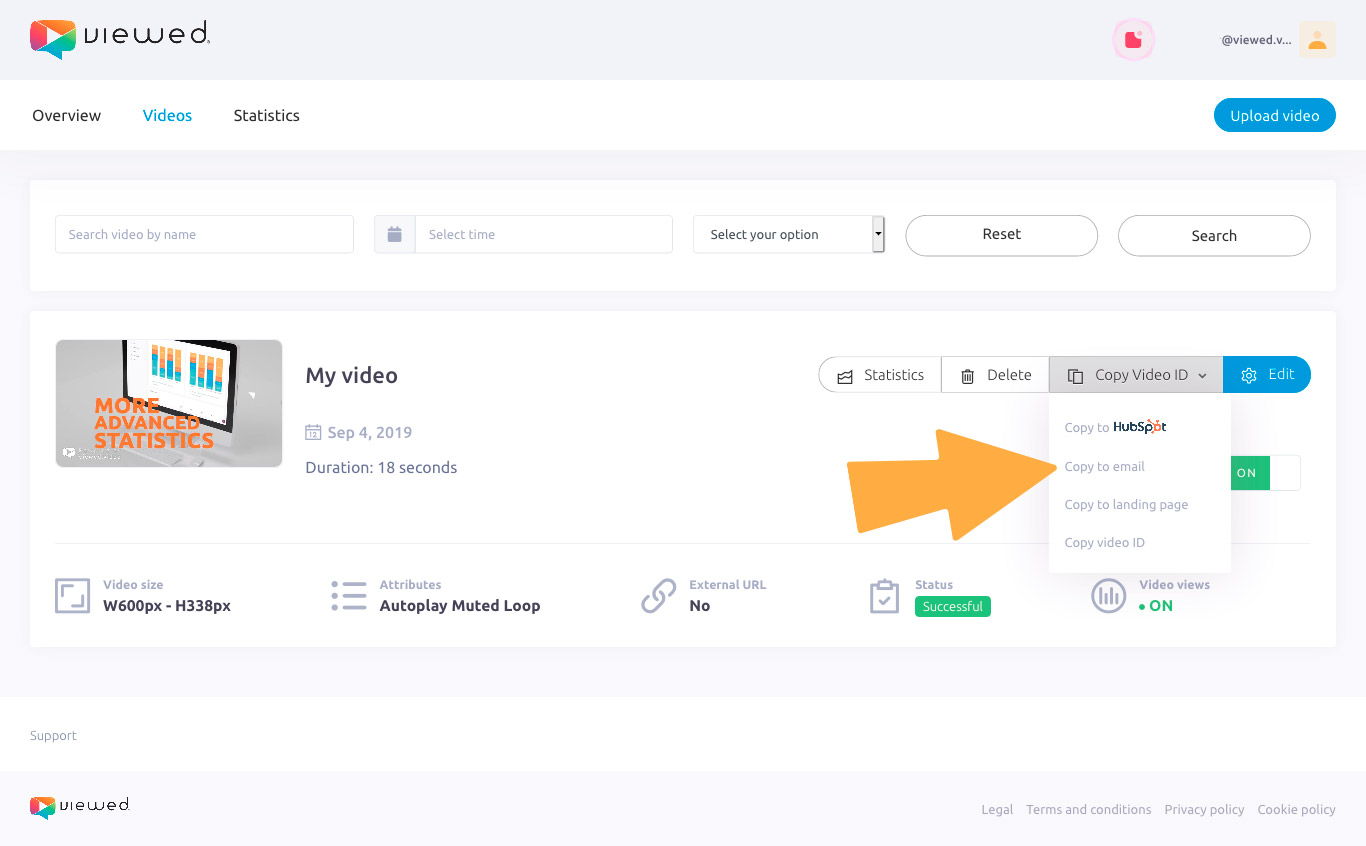
- List of videos: First, click on “Copy Video ID”. Second, select “Copy to email” option.
- List of videos: Click on “Edit” button, this gives you access to a new screen
when you have to click on “Email embed code”.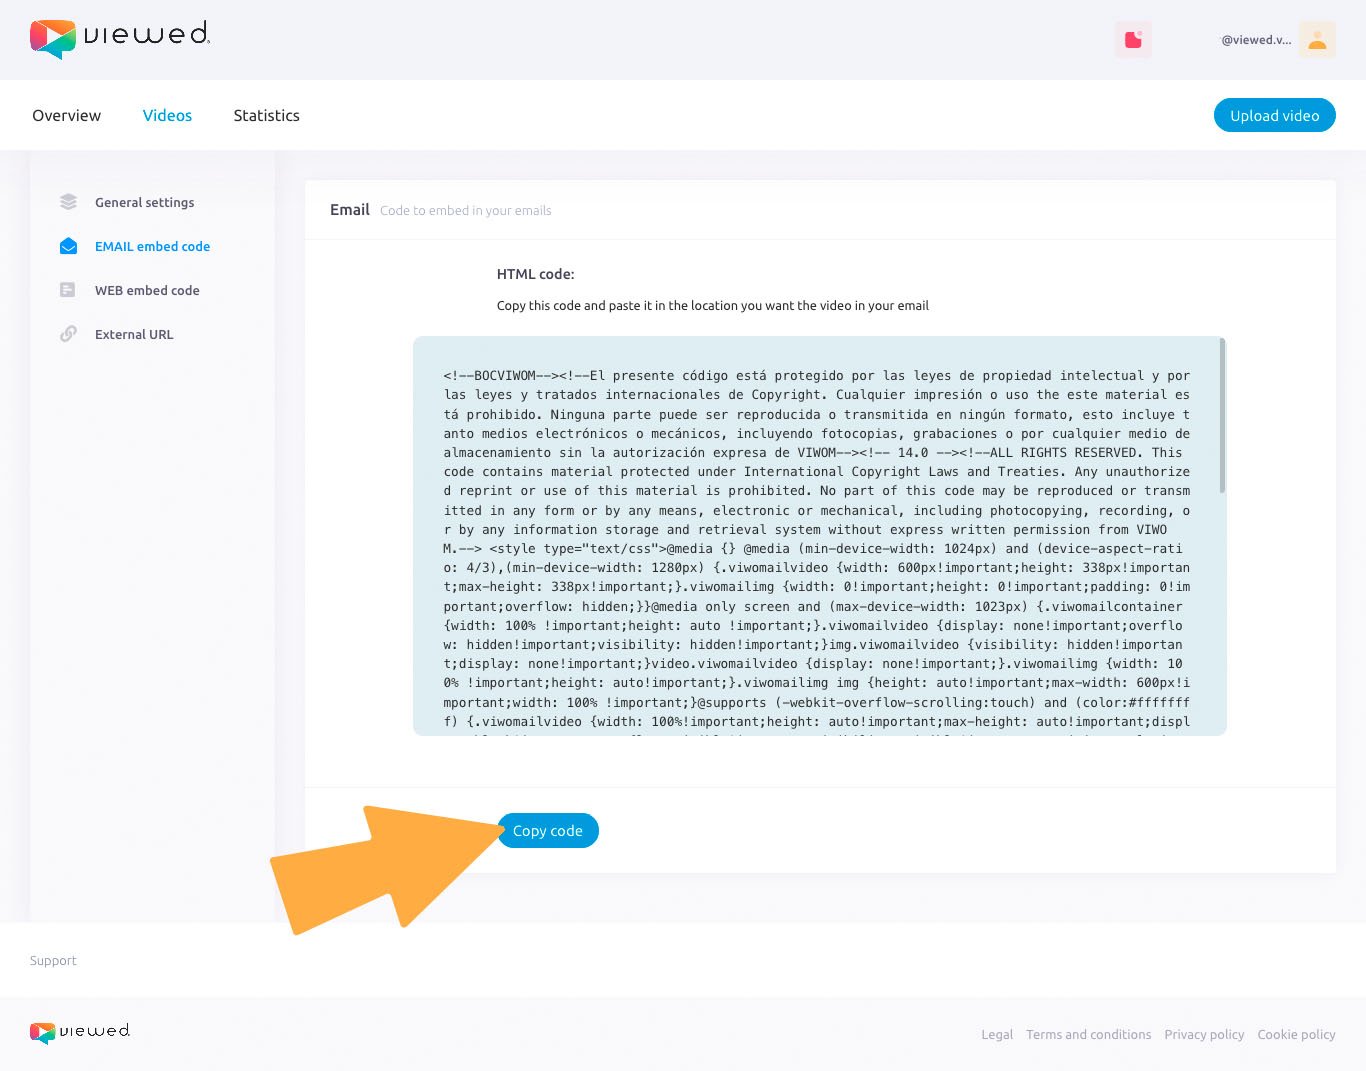
5. Copy Viewed code in your template
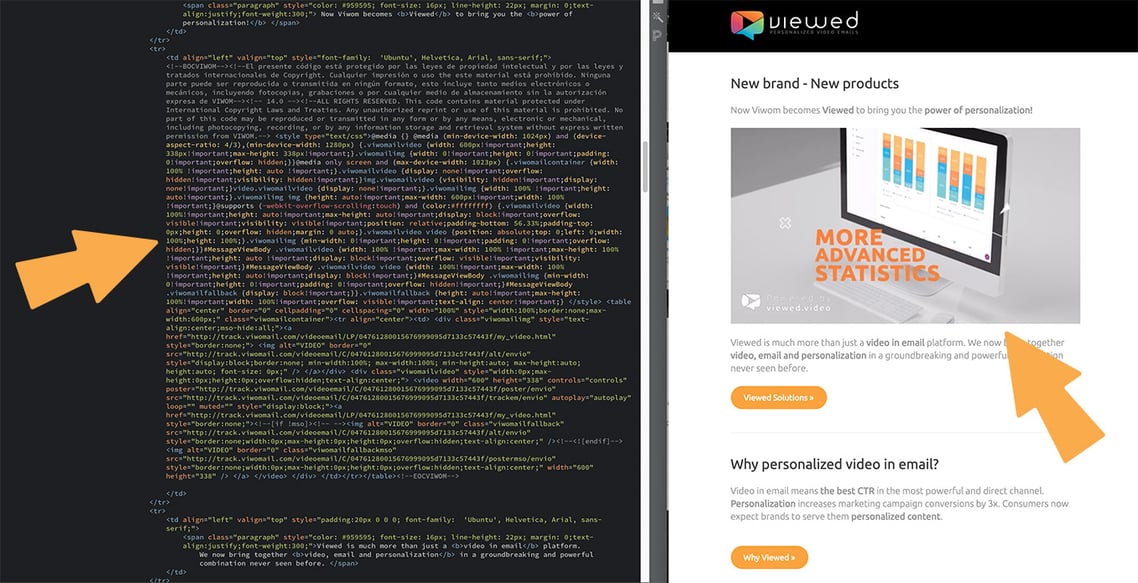
You have to edit the HTML template that you are going to send and insert the code you have copied from Viewed platform. Select the location of the template where you want to display the video.
6. Time to go to Campaign Monitor
Now that you have your HTML template it´s time to go to Campaign Monitor to start your campaign. Just log in to your Campaign Monitor account.

7. Set up a campaign
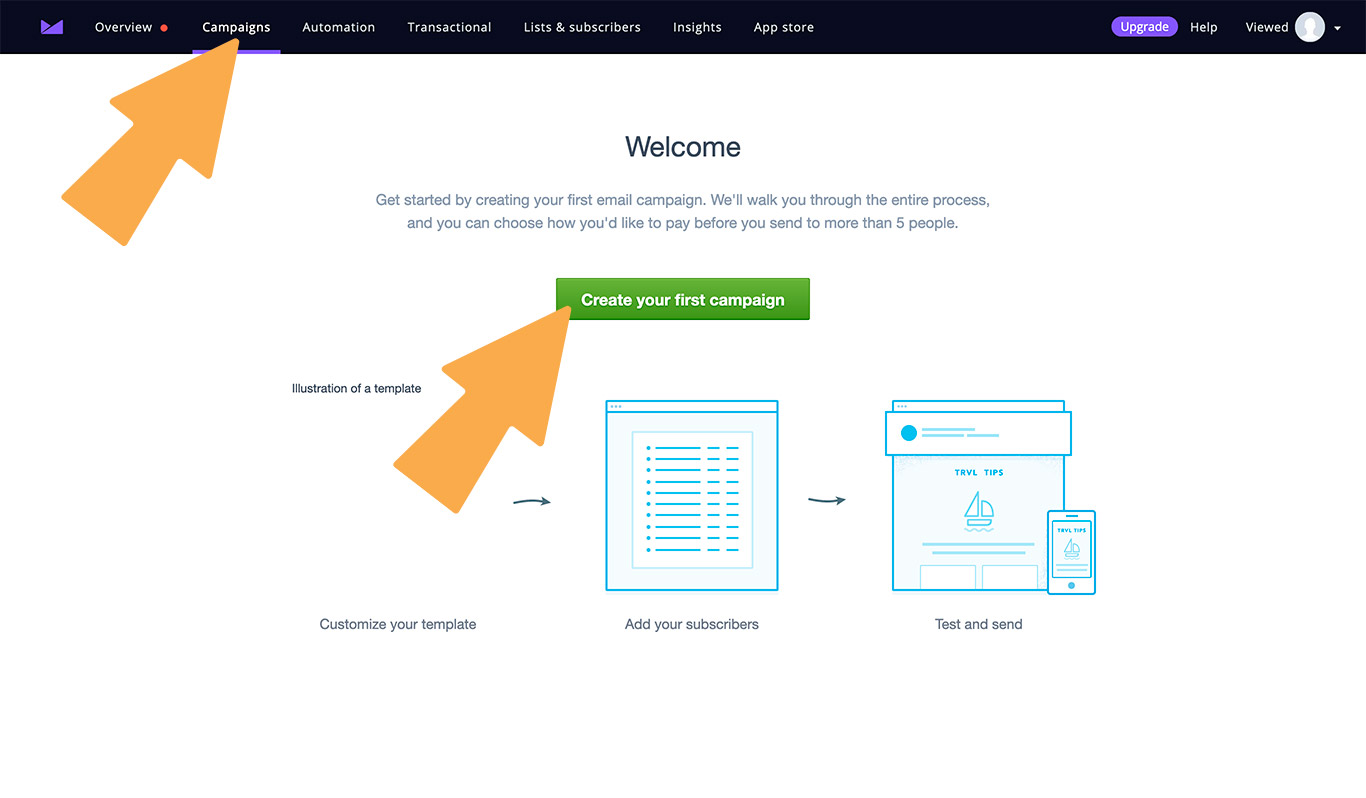
Go to your dashboard and click on “Campaigns“ and then on “Create campaign“-
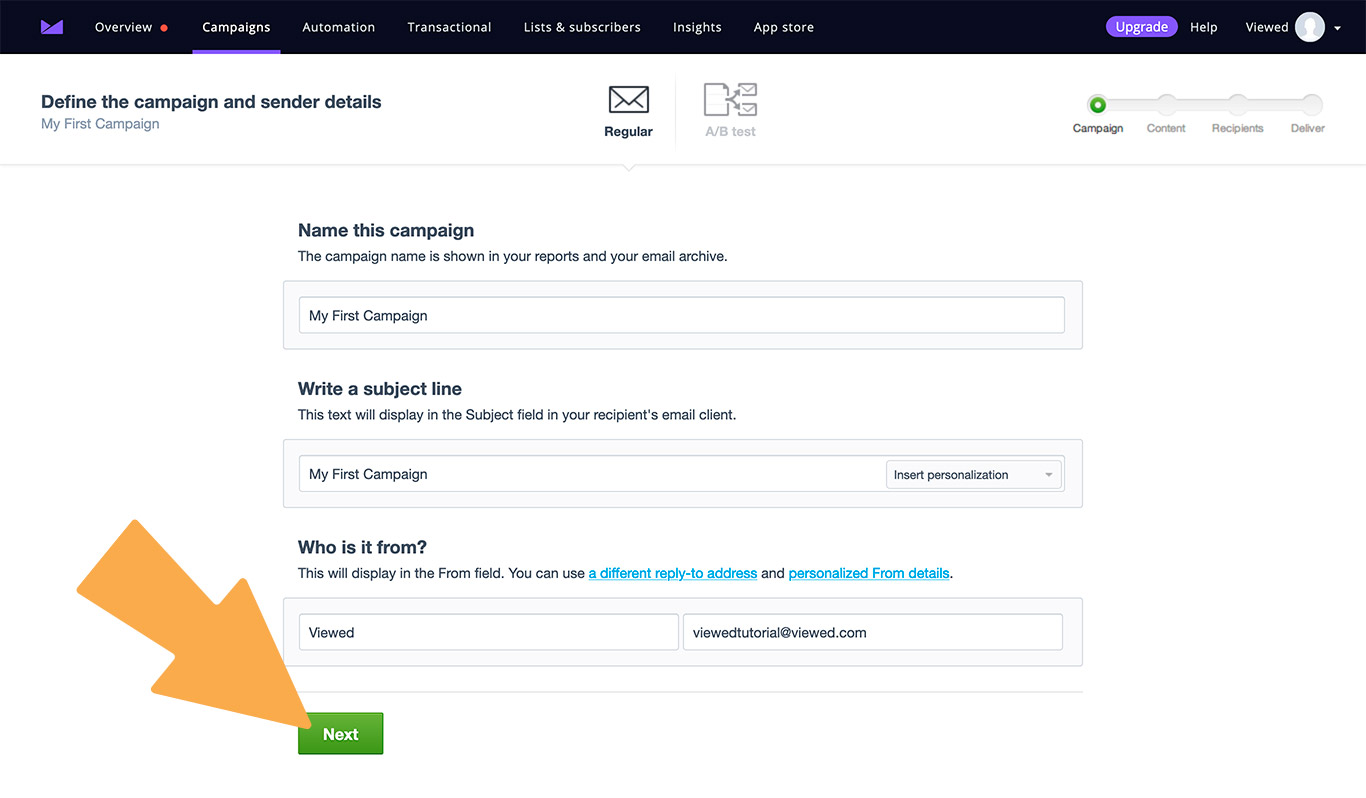
You must fill the campaign details: CAMPAIGN NAME and THE SUBJECT LINE. It is important to describe clearly your campaign purpose in your subject line.
8. Import your HTML template
On the next step you have to choose “Import HTML“ option.
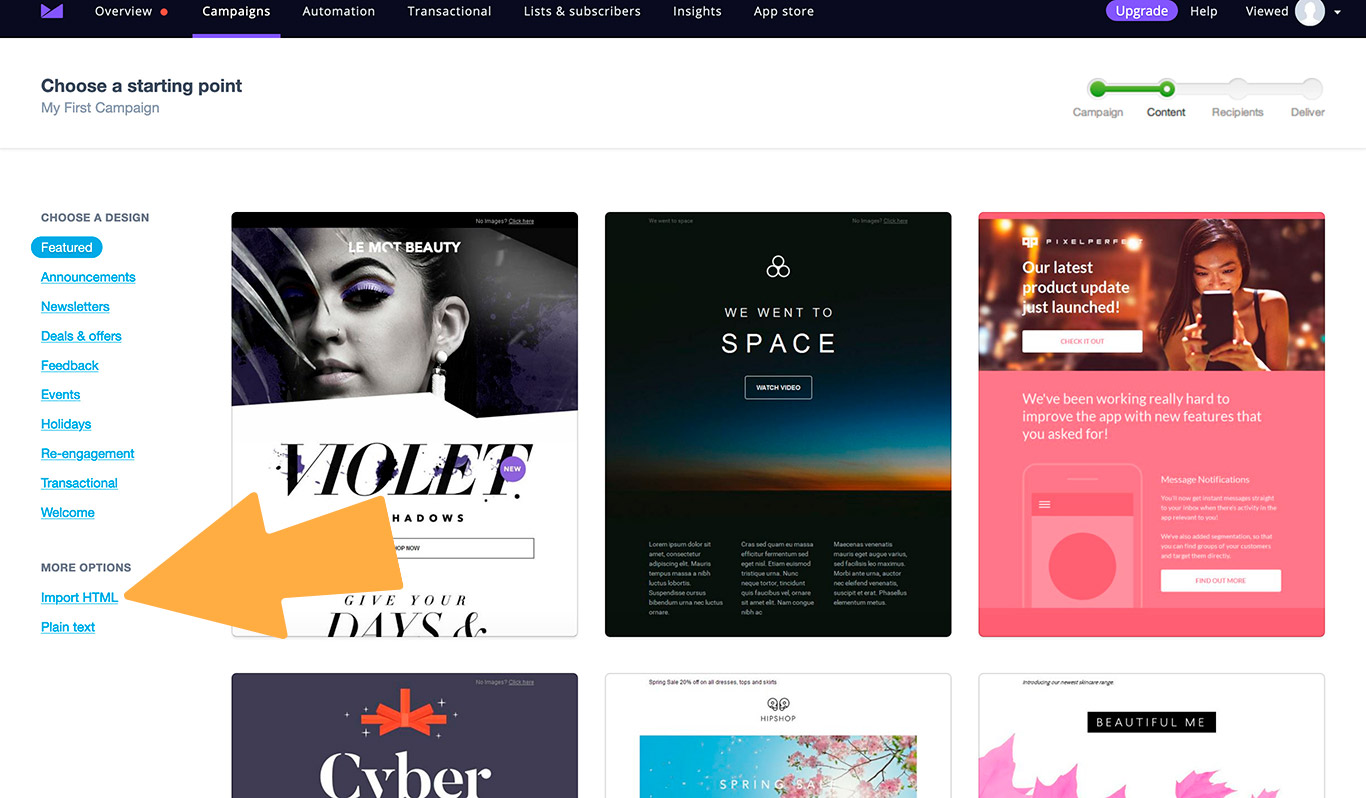
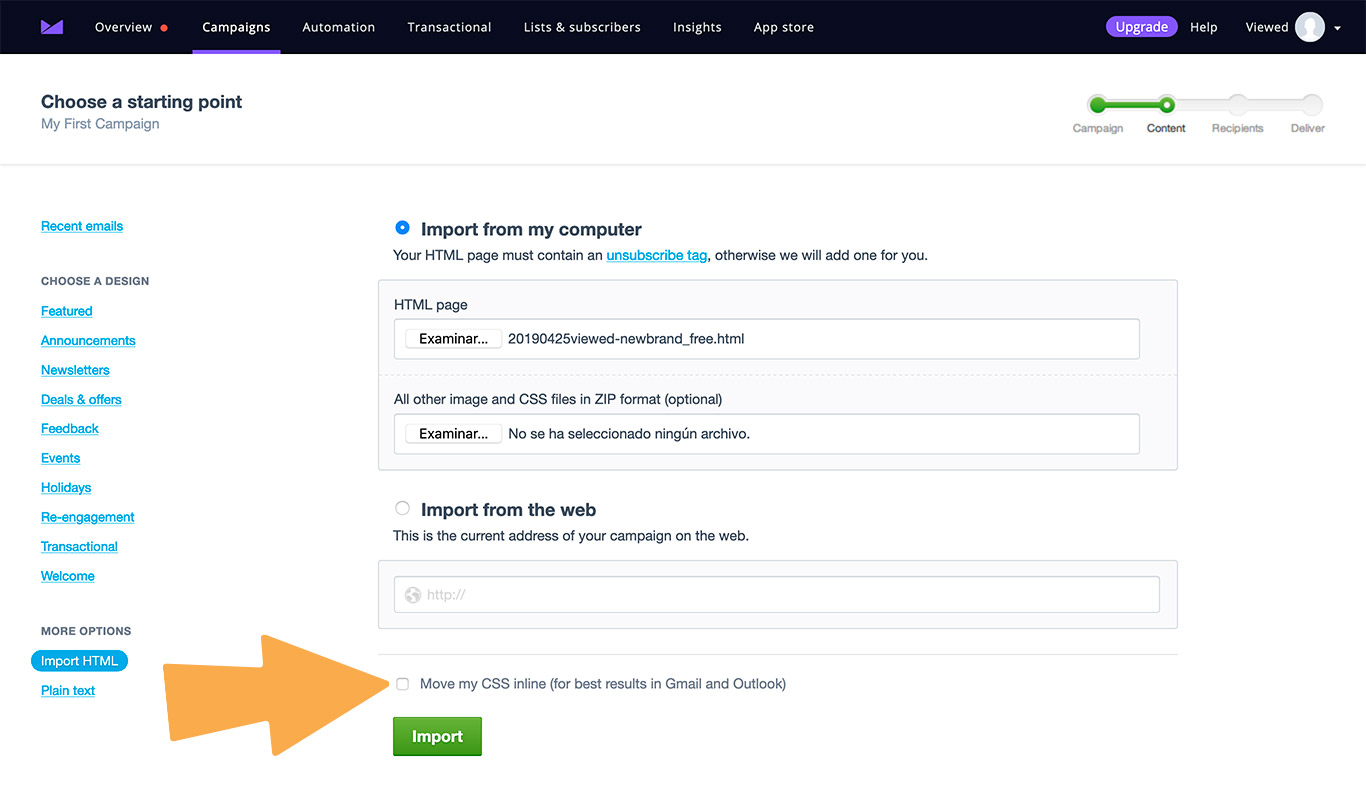
You have to upload the template you have edited previously. Be sure that the checkbox “Move my CSS inline“ is unmarked. Then click on “Import“.
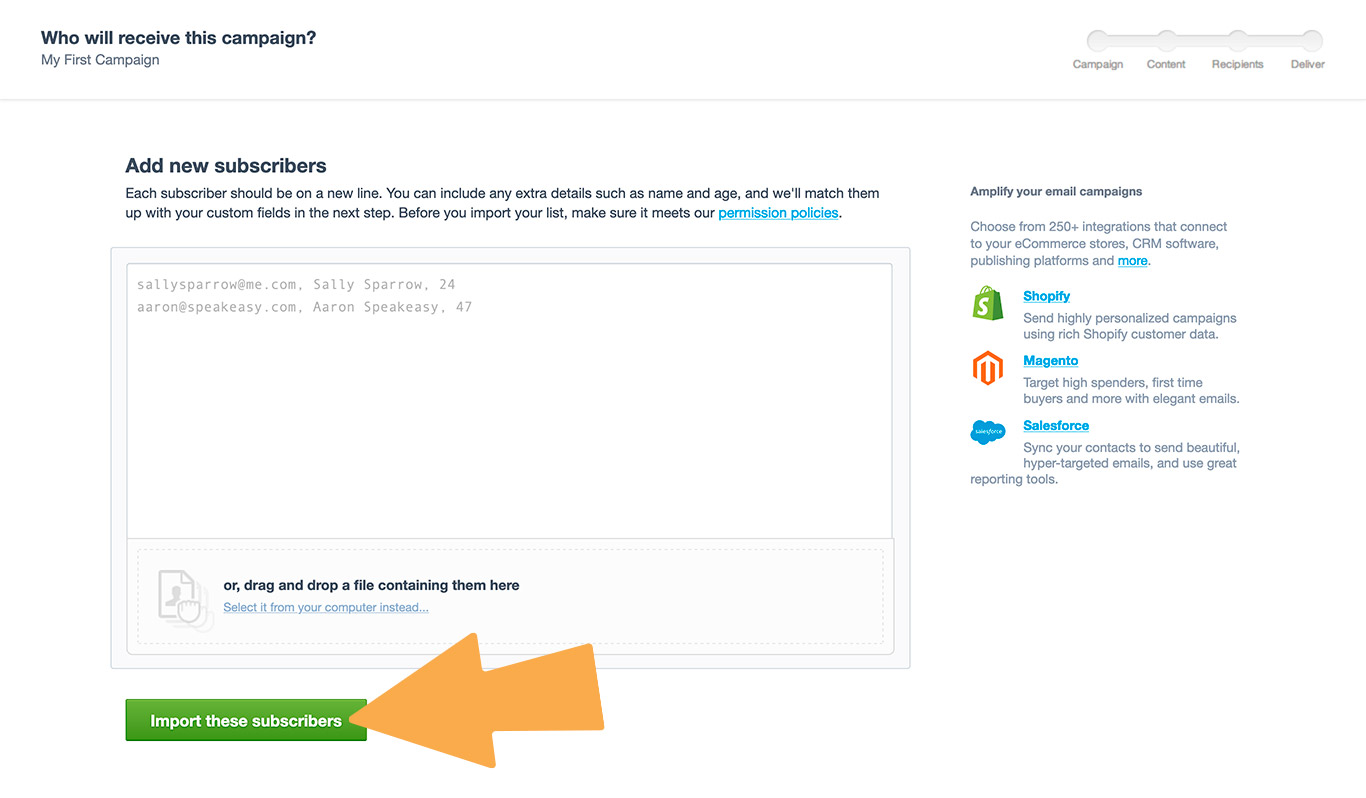
9. Choose recipients
You must define recipients for your email marketing campaign. You can add new subscribers typing them or importing a file. You can import subscribers from a file uploaded from your compute. The accepted file formats can be any EXCEL documents: .xls, .xlsx, .csv, .txt, vCard files or compressed file formats such as .zip, .rar, .7z.
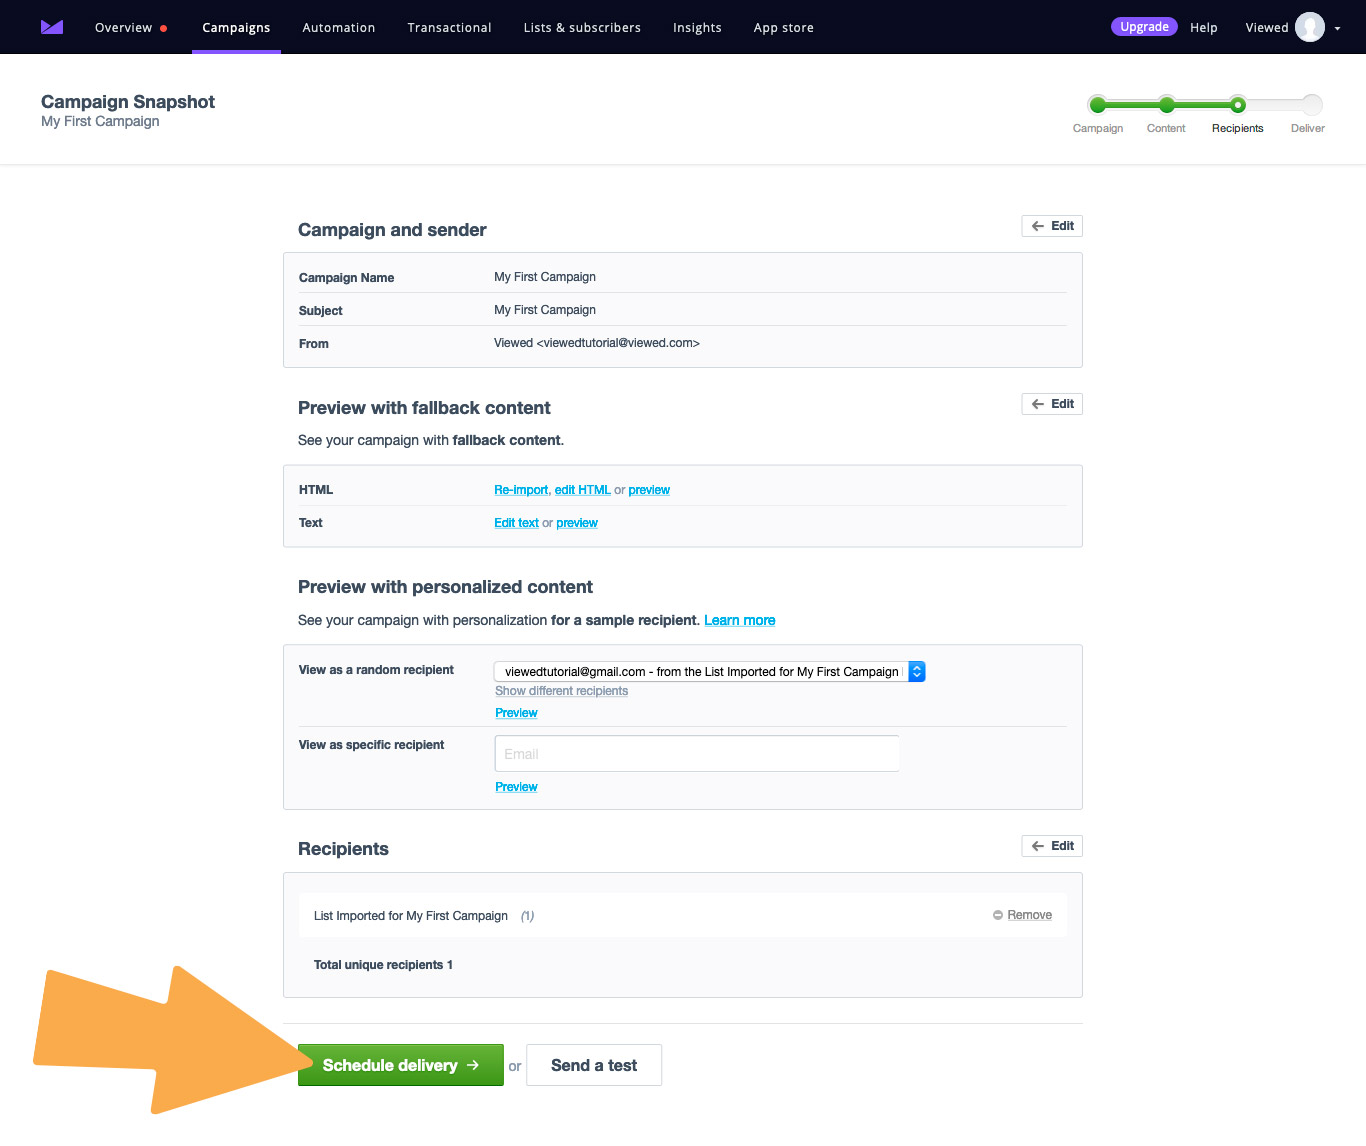
IMPORTANT: Be sure to test your campaign before you send to an entire subscriber list. We highly recommend sending email tests to different web-based email services and to different devices to have a look of how your email campaign will appear to your different clients . You can also preview your email.
10. Time to send your video email
Now it's time to impress the world! You can send your video email now or schedule date and time zone to do so. Now you are ready to go!


.png)
.png)